


Last Updated on June 1, 2021
In a previous article we showed how to build a simple WebRTC browser video application using ApiRTC. In this article you will learn how to bootstrap with ApiRTC and a modern web app framework like Angular.
Table of Contents
How does ApiRTC work?
The first goal of ApiRTC is to enable fast development of real-time communication applications using WebRTC.
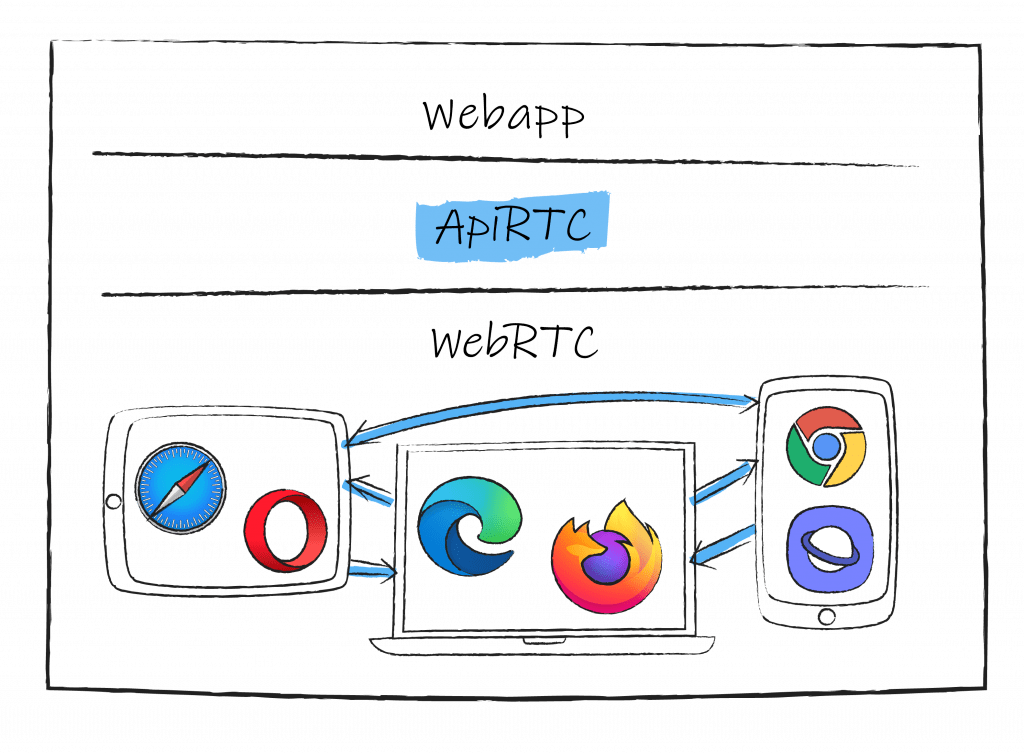
WebRTC, supports video, voice, and generic data to be sent between peers without signaling server, but it doesn’t know how to discover peers. ApiRTC handles all the network services a WebRTC application requires for you.
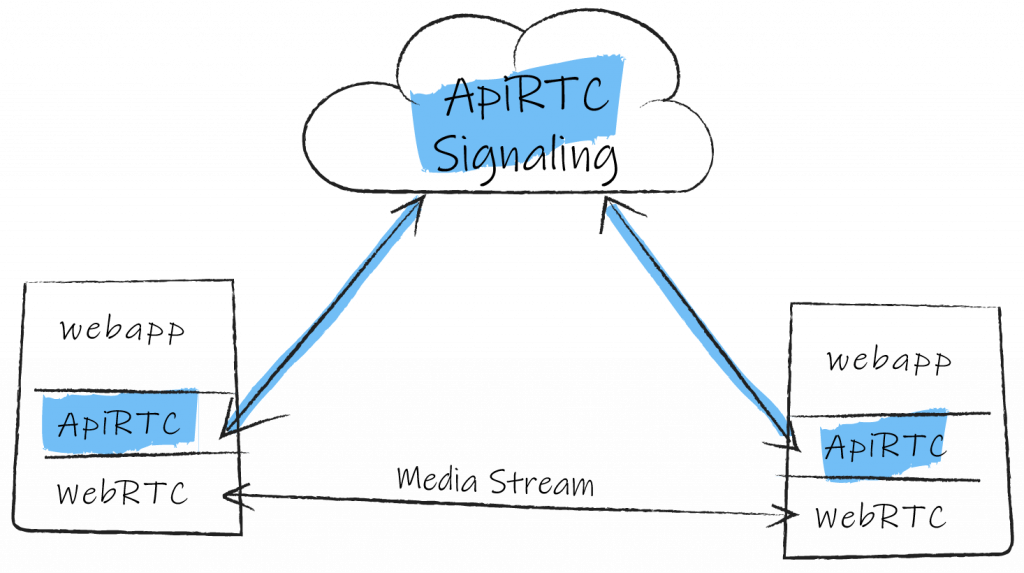
Also WebRTC can be slightly differently implemented by the different navigators. ApiRTC comes as an interoperability layer to handle cross platform real-time communication.
So don’t mind about the signaling, or the different browsers: ApiRTC lets you focus on the web app development alone.
Integration in modern frameworks
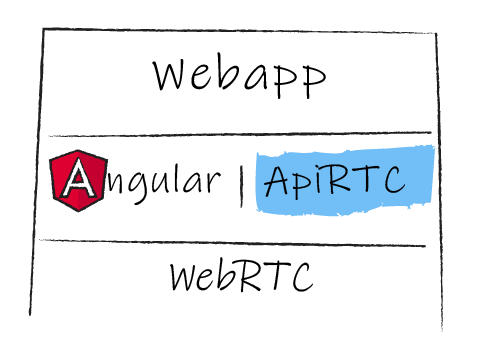
We have observed a growing demand for integrating WebRTC in modern frameworks for building web application. We have packaged ApiRTC javascript api to make it easily used from any of the most used modern frameworks.
In this article we will demonstrate a simple web application developed using Angular and ApiRTC.
A simple WebRTC application
Let’s build a light WebRTC application to video chat with two or more participants:
Step by step tutorial with Angular and ApiRTC
Install angular command line interface
sudo npm install -g @angular/cli
Create the new angular app
ng new ApiRTC-angular
cd ApiRTC-angular
Import angular-material
ng add @angular/material
Import ApiRTC
npm install @apizee/apirtc@latest --save
And make the angular application include the library. In angular.json, under projects, ApiRTC-angular, architect, build, options, add:
"scripts": [
    "node_modules/@apizee/apirtc/apiRTC.min.js"
]
Code the application
- In
src/app/app.module.tsadd imports of modules for angular reactive forms and @angular/material.
import { NgModule } from '@angular/core';
import { BrowserModule } from '@angular/platform-browser';
import { FormsModule, ReactiveFormsModule } from '@angular/forms';
import { BrowserAnimationsModule } from '@angular/platform-browser/animations';
import { MatFormFieldModule } from '@angular/material/form-field';
import { MatInputModule } from '@angular/material/input';

import { AppComponent } from './app.component';

@NgModule({
  declarations: [
    AppComponent
  ],
imports: [
    BrowserModule,
    FormsModule, ReactiveFormsModule,
    BrowserAnimationsModule, MatFormFieldModule, MatInputModule
  ],
  providers: [],
  bootstrap: [AppComponent]
})
export class AppModule { }
- Replace default content of
src/app/app.component.htmlwith a simple form to enter conversation name and tags for remote and local videos.
<div class="container-fluid">
<form [formGroup]="conversationFormGroup" (ngSubmit)="getOrcreateConversation()">
<mat-form-field>
<mat-label>Conversation Name</mat-label>
<input type="text" matInput placeholder="abcd" formControlName="name">
</mat-form-field>
<button mat-raised-button color="primary" type="submit" [disabled]="!conversationFormGroup.valid" title="Get Or Create Conversation">GetOrCreateConversation</button>
</form>
<div>
<div id="remote-container">
</div>
<div id="local-container">
</div>
</div>
</div>
- Code using ApiRTC javascript library in
src/app/app.component.ts
import { Component } from '@angular/core';
import { FormBuilder, FormControl, Validators } from '@angular/forms';

declare var apiRTC: any;
This apiRTC variable will be entry point to use ApiRTC library.
Our AppComponent needs conversation for binding to get the conversation name from the user:
@Component({
  selector: 'app-root',
  templateUrl: './app.component.html',
  styleUrls: ['./app.component.css']
})
export class AppComponent {

  title = 'ApiRTC-angular';

  conversationFormGroup = this.fb.group({
    name: this.fb.control('', [Validators.required])
  });

  constructor(private fb: FormBuilder) {
  }

  get conversationNameFc(): FormControl {
    return this.conversationFormGroup.get('name') as FormControl;
  }

  getOrcreateConversation() {
    // TODO
  }
}
Finally, the implementation of the getOrcreateConversation() method:
getOrcreateConversation() {
    var localStream = null;

    //==============================
    // 1/ CREATE USER AGENT
    //==============================
    var ua = new apiRTC.UserAgent({
      uri: 'apzkey:myDemoApiKey'
    });

    //==============================
    // 2/ REGISTER
    //==============================
    ua.register().then((session) => {

      //==============================
      // 3/ CREATE CONVERSATION
      //==============================
      const conversation = session.getConversation(this.conversationNameFc.value);

      //==========================================================
      // 4/ ADD EVENT LISTENER : WHEN NEW STREAM IS AVAILABLE IN CONVERSATION
      //==========================================================
      conversation.on('streamListChanged', (streamInfo: any) => {
        console.log("streamListChanged :", streamInfo);
        if (streamInfo.listEventType === 'added') {
          if (streamInfo.isRemote === true) {
            conversation.subscribeToMedia(streamInfo.streamId)
              .then((stream) => {
                console.log('subscribeToMedia success');
              }).catch((err) => {
                console.error('subscribeToMedia error', err);
              });
          }
        }
      });
      //=====================================================
      // 4 BIS/ ADD EVENT LISTENER : WHEN STREAM IS ADDED/REMOVED TO/FROM THE CONVERSATION
      //=====================================================
      conversation.on('streamAdded', (stream: any) => {
        stream.addInDiv('remote-container', 'remote-media-' + stream.streamId, {}, false);
      }).on('streamRemoved', (stream: any) => {
        stream.removeFromDiv('remote-container', 'remote-media-' + stream.streamId);
      });

      //==============================
      // 5/ CREATE LOCAL STREAM
      //==============================
      ua.createStream({
        constraints: {
          audio: true,
          video: true
        }
      })
        .then((stream: any) => {

          console.log('createStream :', stream);

          // Save local stream
          localStream = stream;
          stream.removeFromDiv('local-container', 'local-media');
          stream.addInDiv('local-container', 'local-media', {}, true);

          //==============================
          // 6/ JOIN CONVERSATION
          //==============================
          conversation.join()
            .then((response: any) => {
              //==============================
              // 7/ PUBLISH LOCAL STREAM
              //==============================
              conversation.publish(localStream);
            }).catch((err) => {
              console.error('Conversation join error', err);
            });

        }).catch((err) => {
          console.error('create stream error', err);
        });
    });
  }
Run!
Run ng serve for a dev server. Navigate to http://localhost:4200/.
The application can be opened in multiple tabs to test ApiRTC conversation with multiple peers.
You can find the full project on our github.
What’s next?
You have probably noticed that our sample web app is using a myDemoApiKey to access ApiRTC services when instantiating the UserAgent:
var ua = new apiRTC.UserAgent({
      uri: 'apzkey:myDemoApiKey'
    });
In order to go forward with your own application, you will soon require your own apiKey to isolate your conversations from demo users, and benefit from all features ApiRTC can offer.
Get an apiKey for free! When you have one, just replace myDemoApiKey by yours:
var ua = new apiRTC.UserAgent({
      uri: 'apzkey:<YOUR_API_KEY>'
    });
Thank you so much for joining the ApiRTC community. Until the next time, go build great apps!